
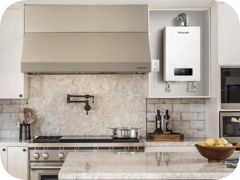

Installing a range hood is a practical DIY project that can help improve indoor air quality in your kitchen by removing smoke, odors, and grease. Here are the steps to guide you through the installation process:
Materials and Tools You'll Need:
- Range hood
- Mounting bracket
- Drill and drill bits
- Screwdriver
- Measuring tape
- Stud finder
- Pencil
- Wire nuts
- Ductwork and elbows (if venting outside)
- Vent cap (if venting outside)
- Caulk and caulk gun
- Level
Installation Steps:
-
Shut Off Power: Before you begin, turn off the power to the existing range hood or the circuit breaker. Ensure it's completely de-energized to prevent electrical accidents.
-
Measure and Mark: Measure the width of your range and center the range hood above it. Mark the desired mounting height on the wall. Use a level to make sure it's straight.
-
Locate and Mark Studs: Use a stud finder to locate the wall studs within the marked area. Typically, studs are spaced 16 inches apart. Mark the stud locations with a pencil.
-
Assemble the Range Hood: Follow the manufacturer's instructions to assemble the range hood, including attaching the mounting bracket to the back of the hood.
-
Drill Holes: Drill holes for screws into the wall studs. The locations should match the holes in the mounting bracket. Use appropriate drill bits based on your wall type (e.g., wood or masonry).
-
Secure the Mounting Bracket: Attach the mounting bracket to the wall using screws. Ensure it's level and securely fastened to the studs.
-
Prepare Ductwork (if venting outside): If you are venting the range hood outside, connect the ductwork and elbows as needed to route the air to the exterior. Secure it using foil tape or clamps. Install a vent cap on the exterior wall.
-
Mount the Range Hood: Lift the range hood and align it with the mounting bracket. Slide it into place, securing it to the bracket with screws or bolts.
-
Connect Wiring: Connect the electrical wires from the range hood to the existing wiring. Typically, black or red wires are connected to hot wires, white wires to neutral wires, and green or bare wires to ground wires. Use wire nuts to secure the connections and cover with an electrical box or plate.
-
Test the Range Hood: Turn the power back on and test the range hood to ensure it's working correctly. Adjust the fan speed and lights as needed.
-
Seal Gaps: Use caulk to seal any gaps between the range hood and the wall. This prevents air leakage and ensures efficient operation.
-
Final Adjustments: Make any final adjustments to ensure the range hood is level, secure, and functioning as desired.
Conclusion
Installing a range hood can vary based on the specific model and your kitchen setup, so always consult the manufacturer's instructions for guidance tailored to your product. If you're uncomfortable with any aspect of the installation, it's advisable to seek professional assistance.
📧CONTACT US: SERVICE@GASLANDCHEF.COM
🛒Shop GASLAND Chef at: https://gaslandchef.com/