


Installing a 36-inch gas cooktop is one of the most rewarding kitchen upgrades you can make—and one of the most technically demanding. The difference between a successful installation and an expensive mistake often comes down to a single measurement, a single connection, or a single test that was skipped. And once the cooktop is in, knowing how to troubleshoot common issues—a clicking igniter, an uneven flame, a burner that won’t light—can save you a service call and hours of frustration.
This guide covers the four most critical areas of gas cooktop installation and maintenance: accurate measurement, post-installation safety testing, igniter troubleshooting, and long-term maintenance scheduling. Whether you’re tackling a DIY kitchen remodel or supervising a contractor, this is the reference you need.
For the complete step-by-step installation walkthrough, see our full Gas Cooktop Installation Guide.
📏 Measurement 101: Getting the 36" Gas Cooktop Cutout Right
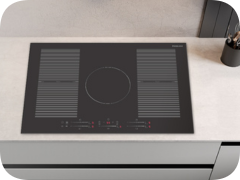
The single most common—and most costly—installation mistake is confusing the cooktop’s overall dimensions with its cutout dimensions. A 36 gas cooktop measures 36 inches across its outer frame. The cutout—the hole you cut in the countertop—is always smaller, because the cooktop’s trim overlaps the countertop surface around the opening.
Typical 36" Cooktop Cutout Dimensions
| Measurement Type | Typical Range | Notes |
|---|---|---|
| Overall width | 36" | The nominal product size |
| Cutout width | 34"–35" | Varies by model—always check manual |
| Cutout depth | 19"–20" | Varies by model—always check manual |
| Minimum cabinet clearance | 2"–3" sides | For heat dissipation and gas connector routing |
| Countertop thickness | 1"–1.5" max | Thicker countertops may require bracket adjustment |
Critical rule: always use the cutout dimensions from your specific model’s installation manual. Do not use dimensions from a different model, a product listing, or a general reference. Cooktop cutout dimensions vary between manufacturers and even between models from the same manufacturer.
The Measurement Process: Step by Step
- Download the installation manual before ordering any materials—confirm the exact cutout dimensions for your specific model
- Measure your existing opening if replacing an old cooktop—different brands have different cutout requirements at the same nominal size
- Mark the cutout on the countertop with a pencil and straightedge—double-check all four dimensions before cutting
- Drill pilot holes at each corner of the cutout before using a jigsaw—this prevents the countertop from cracking at the corners
- Cut from below on laminate countertops to prevent chipping the visible surface
- Test-fit the cooktop before connecting any gas lines—confirm the trim sits flat on the countertop surface with no gaps
For a complete guide to cooktop sizing across all standard sizes, see our How Gas Cooktops Are Measured guide.
🔍 Post-Installation Testing: Gas Leak Detection and Flame Verification
Before cooking a single meal on your newly installed cooktop, two tests are mandatory: a gas leak test and a flame color check. These take less than ten minutes combined and are the difference between a safe installation and a dangerous one.
Test 1: The Soap Bubble Gas Leak Test
- Mix dish soap with water to create a thick, bubbly solution
- Apply the solution generously to every gas connection point: the supply shutoff valve, both ends of the flexible connector, and the cooktop inlet fitting
- Slowly open the gas supply shutoff valve—turn it gradually, not all at once
- Watch each connection point for 30–60 seconds
- ✅ No bubbles = no leak. Proceed to flame testing.
- ❌ Bubbles forming and growing = gas leak. Close the valve immediately, tighten the connection, reapply sealant if needed, and retest. If bubbles persist, do not use the cooktop—contact a licensed plumber.
Never use an open flame to test for gas leaks. Electronic gas detectors (available at hardware stores) provide an alternative testing method and ongoing monitoring capability.

Test 2: Flame Color Verification
After confirming no leaks, light each burner and observe the flame color:
- ✅ Blue flame = complete combustion, correct gas-to-air ratio, safe and efficient operation
- ⚠️ Yellow or orange flame = incomplete combustion. Possible causes: incorrect gas pressure, clogged burner ports, misaligned burner cap, or incorrect gas type (NG vs LP). Do not continue using the cooktop until the cause is identified and corrected.
- ⚠️ Uneven flame (higher on one side) = misaligned burner cap or partially clogged ports. Remove the burner cap, clean the ports, and reseat the cap correctly.
🔧 Igniter Troubleshooting: Why Your Gas Stove Keeps Clicking But Won’t Light
A gas stove igniter that clicks continuously without producing a flame is one of the most common post-installation and post-cleaning complaints. The clicking sound is the igniter spark—the problem is that the spark isn’t reaching the gas, or the gas isn’t reaching the spark. Here’s how to diagnose and fix it.
Cause 1: Moisture on the Igniter Tip (Most Common)
Symptoms: Clicking starts after a boil-over, after cleaning, or in humid conditions. The burner may eventually light after extended clicking, or may not light at all.
Fix:
- Dry the igniter tip with a clean, dry cloth
- Use a hair dryer on low heat for 30–60 seconds to evaporate residual moisture
- Allow the cooktop to air dry for 15–20 minutes before attempting to light again
- After cleaning, always allow the cooktop to dry completely before use
Cause 2: Food Debris Blocking the Igniter Port
Symptoms: Clicking is weak or intermittent. The spark is visible but doesn’t reach the burner consistently.
Fix:
- Use a toothpick or wooden skewer to carefully clear debris from around the igniter tip—never use metal tools that could damage the ceramic igniter body
- Use a soft brush (old toothbrush) to clean the area around the igniter
- Do not use water directly on the igniter—apply cleaning solution to a cloth and wipe carefully
Cause 3: Misaligned Burner Cap
Symptoms: Clicking is strong but the burner won’t light, or lights unevenly. Often occurs after cleaning when the burner cap is replaced incorrectly.
Fix:
- Remove the burner cap and grate
- Inspect the burner base for debris and clean if necessary
- Replace the burner cap, ensuring it sits completely flat with no rocking or tilting
- Align the notch or flat edge on the cap with the corresponding mark on the burner base
- Test ignition—a correctly seated cap should light within 2–3 clicks
Cause 4: Worn or Damaged Igniter Electrode
Symptoms: No clicking sound, or clicking with no visible spark. Occurs after years of use or after physical damage to the igniter tip.
Fix: The igniter electrode requires replacement. Contact GASLAND customer support or a licensed appliance technician. Do not attempt to repair the igniter electrode yourself—it is connected to the high-voltage ignition system.
Quick Igniter Diagnostic Chart
| Symptom | Most Likely Cause | DIY Fix |
|---|---|---|
| Clicking but no flame, after cleaning | Moisture on igniter | Dry with cloth / hair dryer |
| Weak or intermittent spark | Debris on igniter port | Clean with toothpick + soft brush |
| Strong click, no ignition | Misaligned burner cap | Remove, clean, reseat cap correctly |
| All burners clicking simultaneously | Moisture in ignition module | Allow to dry 30–60 min; use hair dryer |
| No click, no spark | Worn electrode or wiring fault | Contact technician for replacement |
For a comprehensive troubleshooting reference covering all common gas cooktop issues, see our Gas Cooktop Troubleshooting guide.
🗓️ Maintenance Schedule: How Often to Clean for Peak Performance
A gas cooktop that is cleaned and maintained on schedule performs better, lasts longer, and costs less to operate than one that is cleaned reactively. Here’s the complete maintenance schedule for a 36 gas cooktop:

After Every Use
- Wipe burner caps with a damp cloth while still warm (not hot) to prevent food from baking on
- Wipe the cooktop surface to remove spills and grease before they harden
- Check that all burner caps are correctly seated after any movement
Weekly
- Remove burner caps and wash with warm soapy water
- Use a toothpick to clear individual burner port holes of any debris
- Clean the burner base area with a damp cloth
- Dry all components completely before reassembly
- Inspect igniter tips for debris and clean if necessary
Monthly
- Full burner disassembly: soak caps in warm soapy water for 20 minutes, scrub with a soft brush, rinse thoroughly
- Inspect the cooktop surface for scratches, chips, or stress marks
- Check that all burner caps realign correctly and sit completely flat
- Inspect the flexible gas connector for kinks, corrosion, or damage—replace if any defects are found
- Verify all burner flames are blue and even after reassembly
Annually
- Schedule professional servicing to inspect gas connections, burner performance, and ignition system
- Have the gas supply pressure verified by a licensed technician
- Inspect and replace the flexible gas connector if it is more than 5 years old
For a complete annual servicing checklist, see our Service Frequency Guide.
👨🔧 DIY vs. Professional: Where to Draw the Line
Most homeowners can safely handle the countertop cutting, cooktop placement, and post-installation testing. The gas line connection is where the DIY vs. professional decision becomes critical.
| Task | DIY Feasible? | Notes |
|---|---|---|
| Measuring and marking cutout | ✅ Yes | Use installation manual dimensions exactly |
| Cutting countertop opening | ✅ Yes | Requires jigsaw; drill pilot holes at corners first |
| Placing and securing cooktop | ✅ Yes | Install all mounting clips and silicone seal |
| Connecting flexible gas connector | ⚠️ Check local codes | Some jurisdictions require licensed plumber |
| Gas leak testing | ✅ Yes (mandatory) | Soap bubble test required regardless of installer |
| Gas pressure verification | ❌ Professional only | Requires calibrated pressure gauge and gas expertise |
| Igniter electrode replacement | ❌ Professional recommended | High-voltage ignition system; risk of damage |
Frequently Asked Questions
What is the cutout size for a 36 inch gas cooktop?
A 36 gas cooktop cutout typically measures approximately 34"–35" wide and 19"–20" deep, but exact dimensions vary by model. Always use the cutout dimensions from your specific model’s installation manual—never assume based on the overall product size.
How do I detect a gas leak after installing a cooktop?
Use the soap bubble test: apply a thick soap-and-water solution to all gas line connections, open the valve slowly, and watch for growing bubbles. Any bubbles indicate a leak—tighten and retest. Never use an open flame to test for gas leaks.
Why does my gas stove igniter keep clicking but not lighting?
The most common causes of troubleshooting gas stove igniters are moisture on the igniter tip, food debris blocking the port, or a misaligned burner cap. Dry the igniter, clean around the port with a toothpick, and ensure the burner cap is correctly seated. If clicking continues with no spark, the electrode may need professional replacement.
Should I install a gas cooktop myself or hire a professional?
Countertop cutting and cooktop placement are typically DIY-feasible. The gas line connection depends on local codes—some jurisdictions require a licensed plumber. Always perform a gas leak test regardless of who completes the gas cooktop installation.
How often should I clean my gas cooktop burners?
Wipe burner caps after every use, perform a full cleaning weekly, do a deep soak monthly, and schedule professional servicing annually. Regular cleaning maintains blue flame combustion and peak thermal efficiency—a key factor in long-term appliance performance.
🔧 Install Right, Maintain Well, Cook Confidently
A properly installed and maintained gas cooktop is one of the most reliable appliances in your kitchen. The four areas covered in this guide—accurate measurement, post-installation safety testing, igniter troubleshooting, and regular maintenance—are the foundation of a cooktop that performs at its best for years.
For help choosing the right cooktop for your kitchen before installation, see our Guide to Choosing the Perfect Gas Cooktop. And when you’re ready to install, our complete Gas Cooktop Installation Guide walks you through every step from unboxing to first flame.